Heel-Lock Lacing: How To Tie A Runner’s Knot To Stop Your Heel From Slipping
Make use of the extra eyelets on running shoes by tying a more secure runner’s knot

There are a lot of differences between the best running shoes and casual shoes, but one that may have puzzled you is why running shoes have two extra eyelets at the top.
These aren’t there just for fun, although they are undoubtedly fun – they are there to be used to tie a runner’s knot. This is also known as heel-lock lacing, which gives more of a clue as to the point of it. Speaking of which…
What is the point of a runner’s knot?
One of the first concerns experienced runners have when trying on a shoe for the first time is whether it slips at the heel. Even fairly minor movement at the heel during a run will result in rubbing that causes pain or a blister after a while. This slipping can happen even in a shoe that fits perfectly well around your toes and midfoot.
The runner’s knot is a way to limit the risk of heel slippage, since it creates a more secure hold around the collar of the shoe. Heel-lock lacing is something that trail runners often use, because it’s common for the heel to slip when pounding down long descents, but all runners can benefit from trying it if they find their heel is slipping.
Does heel-lock lacing work?
In my experience as a running shoe reviewer, tying a runner’s knot eliminates heel slippage about 90% of the time I’ve noticed it on a shoe, and even when it doesn’t completely solve the problem it does usually make it a lot better. It’s not a guaranteed solution – some running shoes simply won’t fit your heel – but it’s definitely worth trying before giving up on a shoe.
How To Tie A Runner’s Knot
Step 1: Make Loops

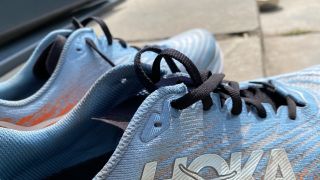
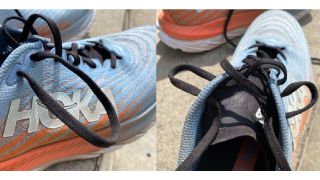
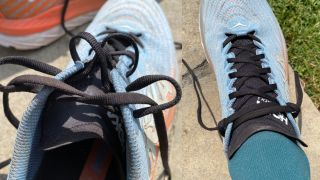
Start by creating a loop with each lace by threading it through the extra eyelet on the same side – don’t cross over like you would to lace a shoe normally. Pull the laces through until the loops on each side are quite small.
Step 2: Thread The Lace Through

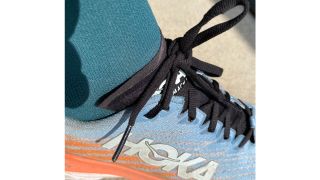
Thread the lace through the loop on the opposite side and pull it fairly tight.
Tie your laces as normal from there.

When you first tie a runner’s knot you’ll probably pull it very tight – the idea is to secure the heel, after all – but this can create uncomfortable pressure on top of your foot from the laces. Don’t give up. It can take a few attempts to find the right balance between security and comfort.
The only other downside of the runner’s knot is that it can make a shoe harder to slip on and off, but buying a shoe horn is a small price to pay to avoid blisters on your heel.
Get the Coach Newsletter
Sign up for workout ideas, training advice, reviews of the latest gear and more.

Nick Harris-Fry is a journalist who has been covering health and fitness since 2015. Nick is an avid runner, covering 70-110km a week, which gives him ample opportunity to test a wide range of running shoes and running gear. He is also the chief tester for fitness trackers and running watches, treadmills and exercise bikes, and workout headphones.
